
Add Horse Update
1. Select Branding Template
At the top of the form, choose any branding template set up. This controls the logo, colors, and footer information shown in your email.
👉 Branding templates can be set up and edited under Settings > Communications Template.
2. Choose Horses
Search and select one or more horses to include in the update.
When horses are selected, EPONA will automatically populate recipients based on the Interested Parties selected as notifiable are auto-added. But you can add any contact available in EPONA searching by name.
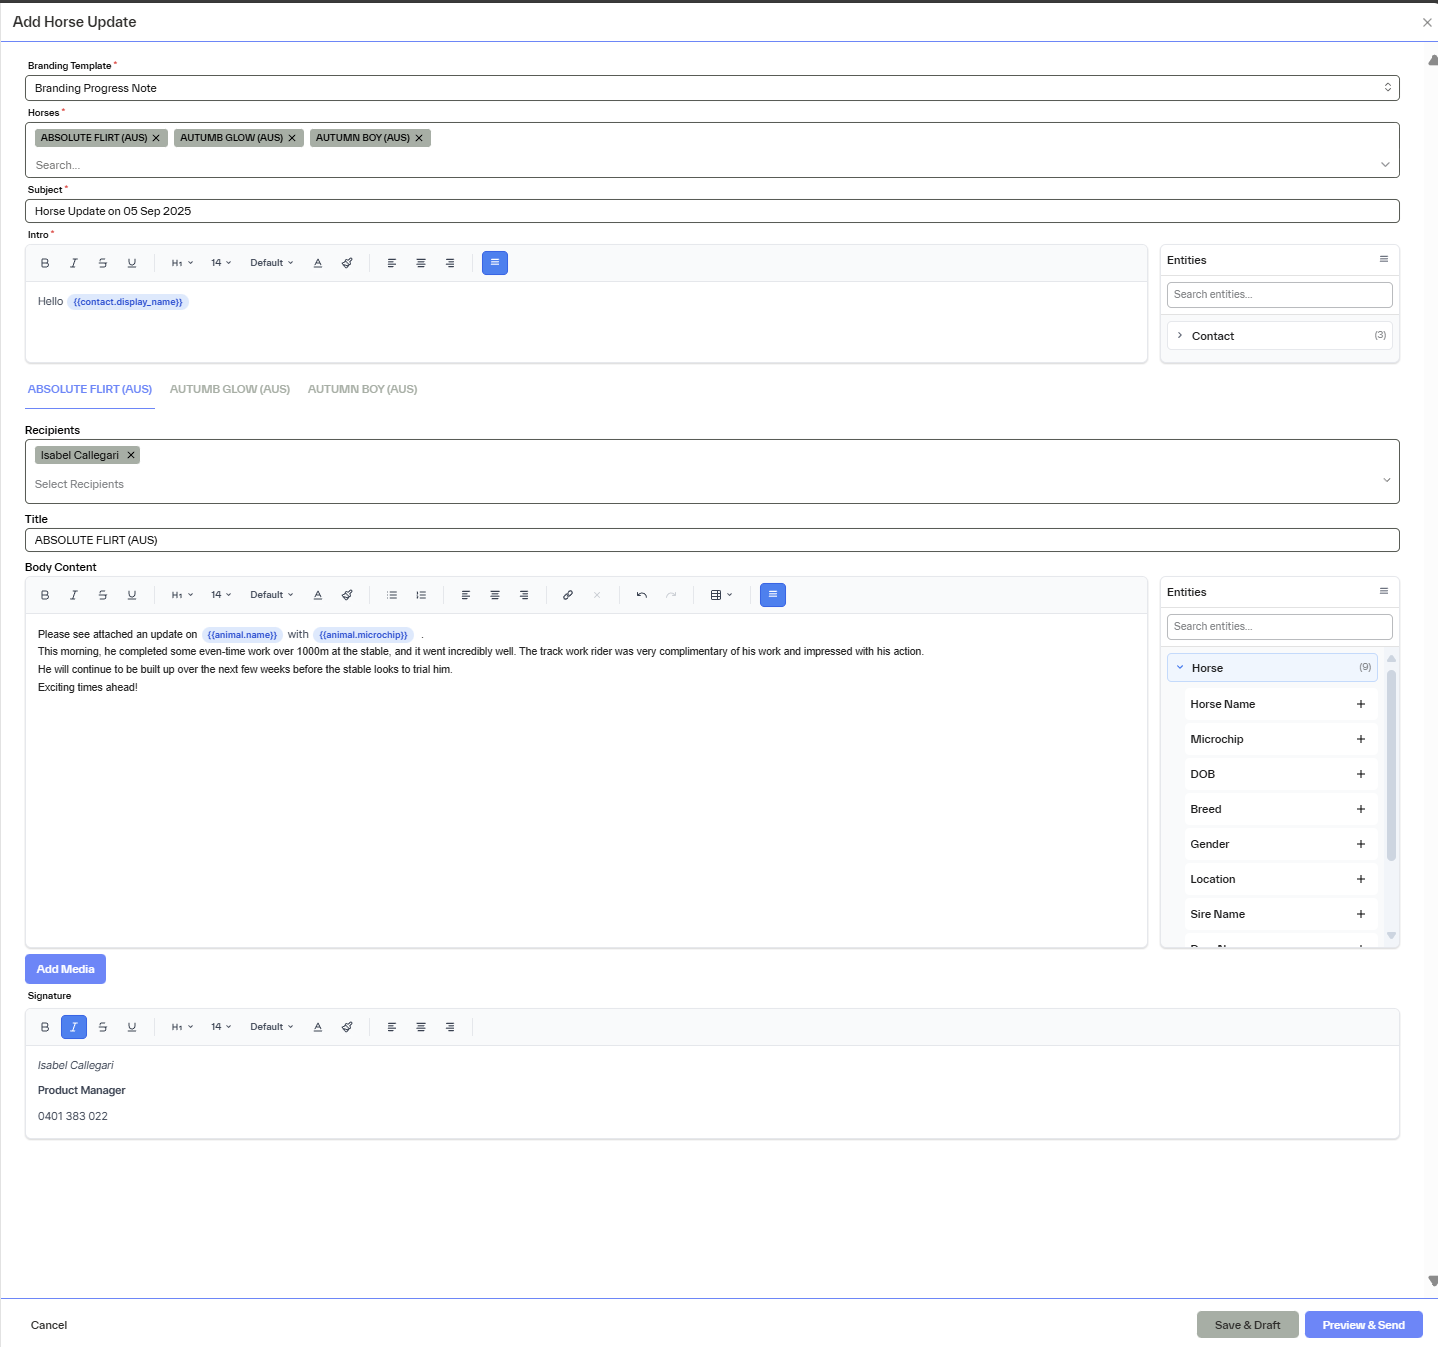
3. Add Subject, Intro & Content
Fill in:
- Subject (appears in the email subject line and it is prepopulated with "Horse Update on [Today's date]" but it is editable.
- Intro (short greeting or lead-in prepopulated with " Hello [Display Name]" but editable
- Body Content (full update per horse)> user can add text for each horse and choose format.
On the right side, use the Entity panel to pull in dynamic fields like:
- Contact: Display Name, First/Last Name
- Horse: Name, DOB, Sire, Dam, Microchip, Location, etc.
- Current Date
Tokens will be replaced with real values when the email is sent. Preview available before sending .
4. Add Media
Use the Add Media button to upload multi images or documents.User can set one image as the hero image by clicking the star.
5. Preview and send
Click Preview to see exactly how the email will look for each recipient
6. Save as Draft or Send
You can:
Save as Draft: Creates one draft per unique horse + recipient combination. This makes it easy to review and selectively send later.
Preview & Send: Finalize and send immediately to all recipients.
Drafts and sent updates are tracked in the Communications screen, so you always know what was delivered, when, and to whom.Type your content here.