
Step 4: Statements
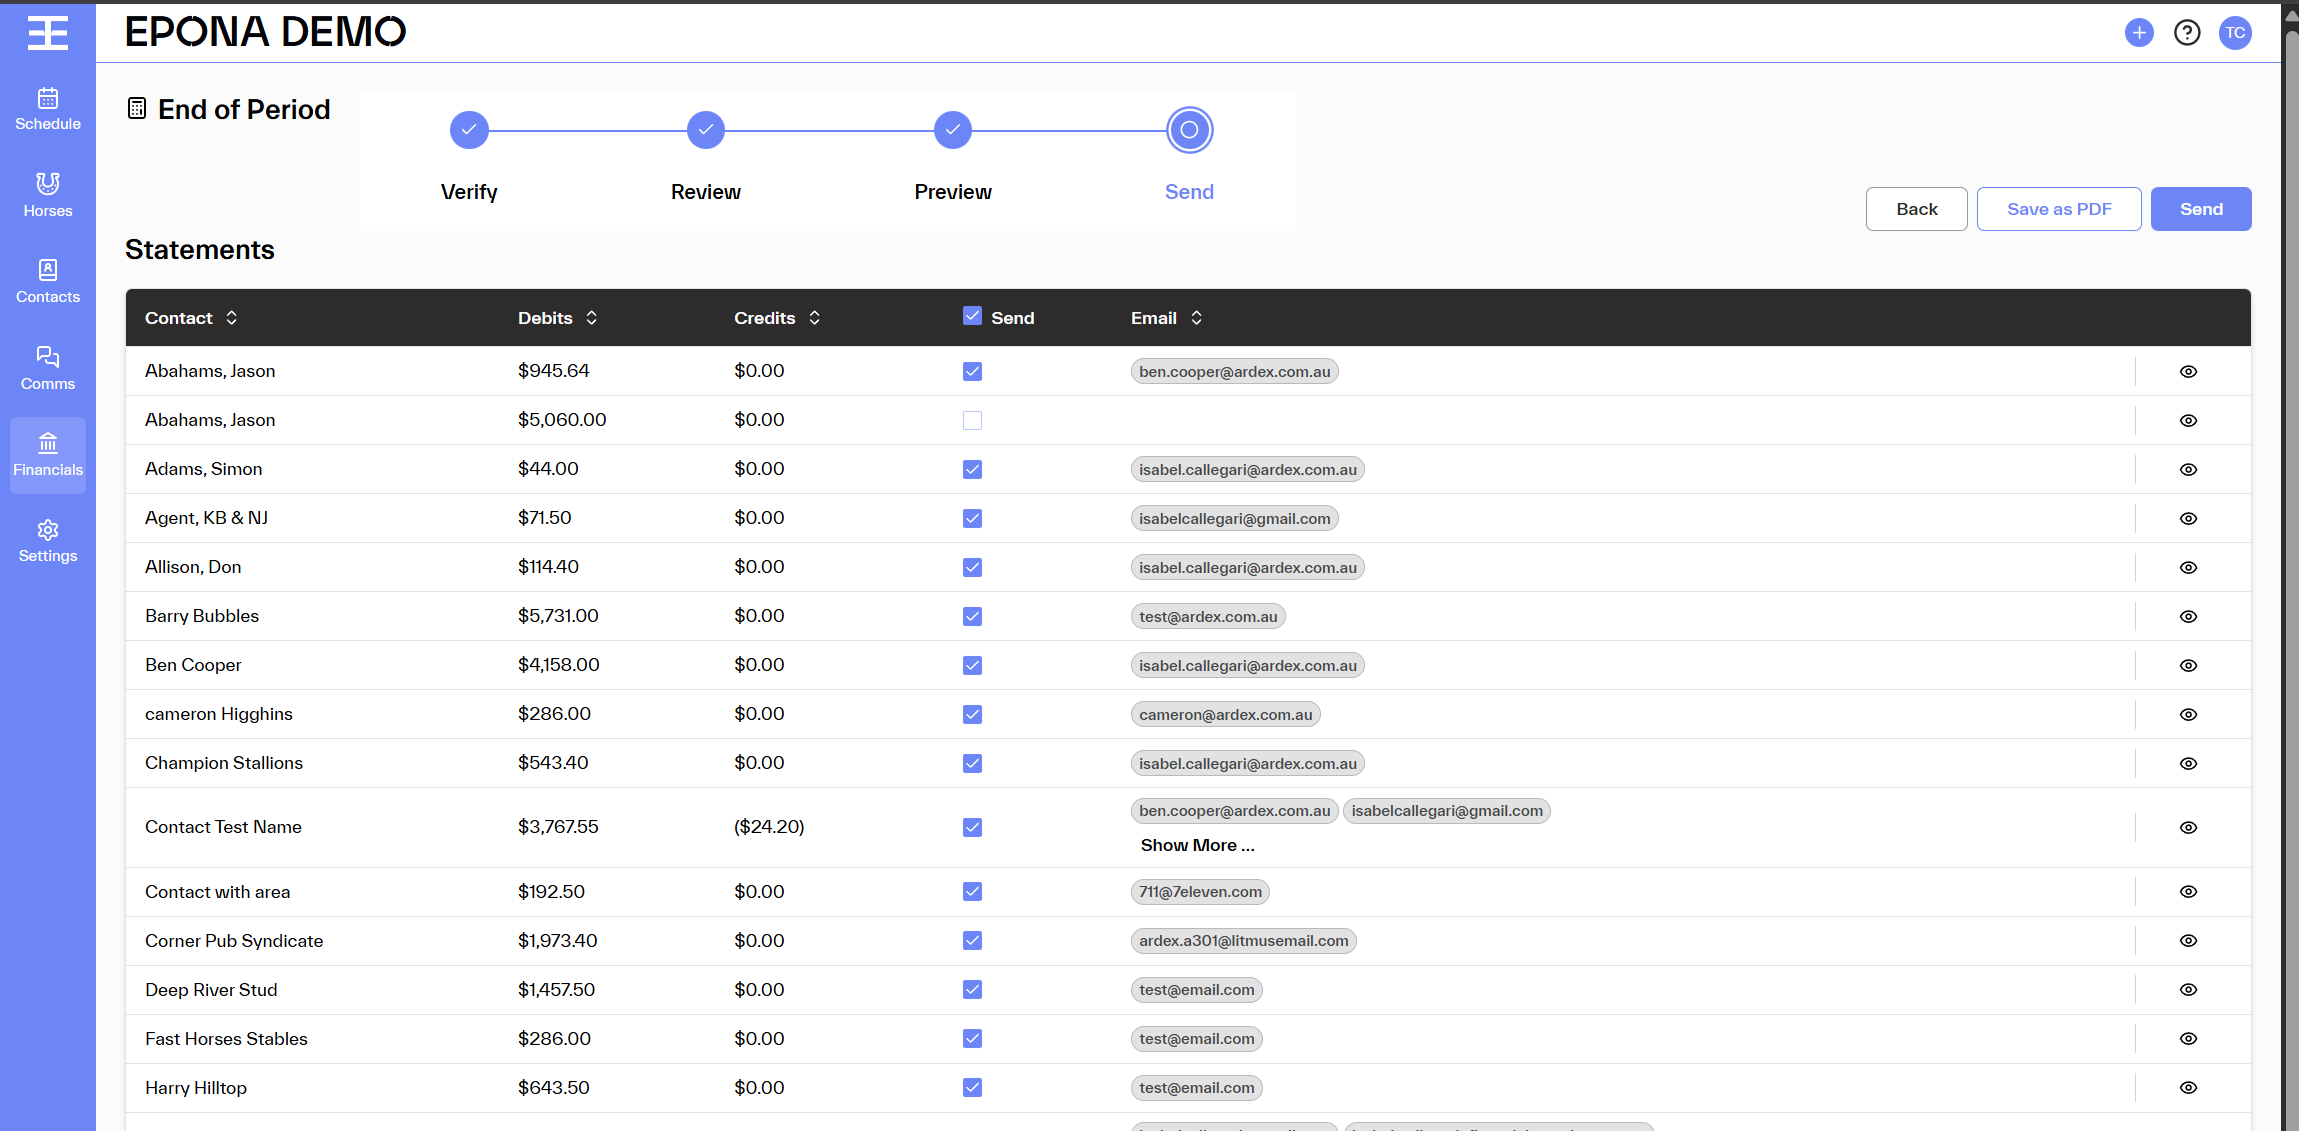
The Send step is where you review account statements for each contact and choose which statements to send via email.
What You'll See
Statements Table Each row represents a statement for one contact, displaying:
| Column | Description |
|---|---|
| Contact | The billable contact's name |
| Debits | Charges added during the period |
| Credits | Payments or credits received (shown in brackets if negative) |
| Send? | Checkbox to include/exclude this statement from the send |
| The email address where the statement will be sent | |
| Action | Preview button to view the statement |
How to Use This Screen
Selecting Statements to Send
- Each statement has a Send? checkbox
- Tick the checkbox to include a statement in the email batch
- Untick to exclude a statement (the contact won't receive an email)
Select All / Deselect All Use the checkbox in the Send? column header to:
- Select all statements for sending (tick)
- Deselect all statements (untick)
Previewing a Statement Click the Eye icon in the Action column to preview a statement before sending.
Exporting Statements Click Export Statements to download statement data for your records or for import into other systems.
Sending Statements
When you're ready to send:
- Ensure all desired statements have the Send? checkbox ticked
- Verify email addresses are correct for each contact
- Click the Send Statements button
All selected statements will be emailed to the respective contacts.
Tips
- Review the Closing balance column to identify accounts with outstanding amounts
- Contacts with a closing balance of $0 may not require a statement
- Use the Preview feature to check statement accuracy before sending
- If an email address is incorrect, update it in the contact's profile before sending
Navigation
- Click Back to return to the Preview step
- Once statements are sent, the End of Period process is complete