
Templates (Comms Automation)
Overview
The Templates tab in 'Communications Settings' allows Admin users to configure automated email communications triggered by key system events - such as a horse arriving, departing, or having a procedure completed.
When one of these events is processed, a Notify checkbox appears on the relevant screen (e.g. Add Procedure, Add Movement). Whether the Notify checkbox is pre-checked - and what happens when it is - is controlled by your template settings.
Navigate to Settings → Communications Settings → Templates to manage your communications templates.
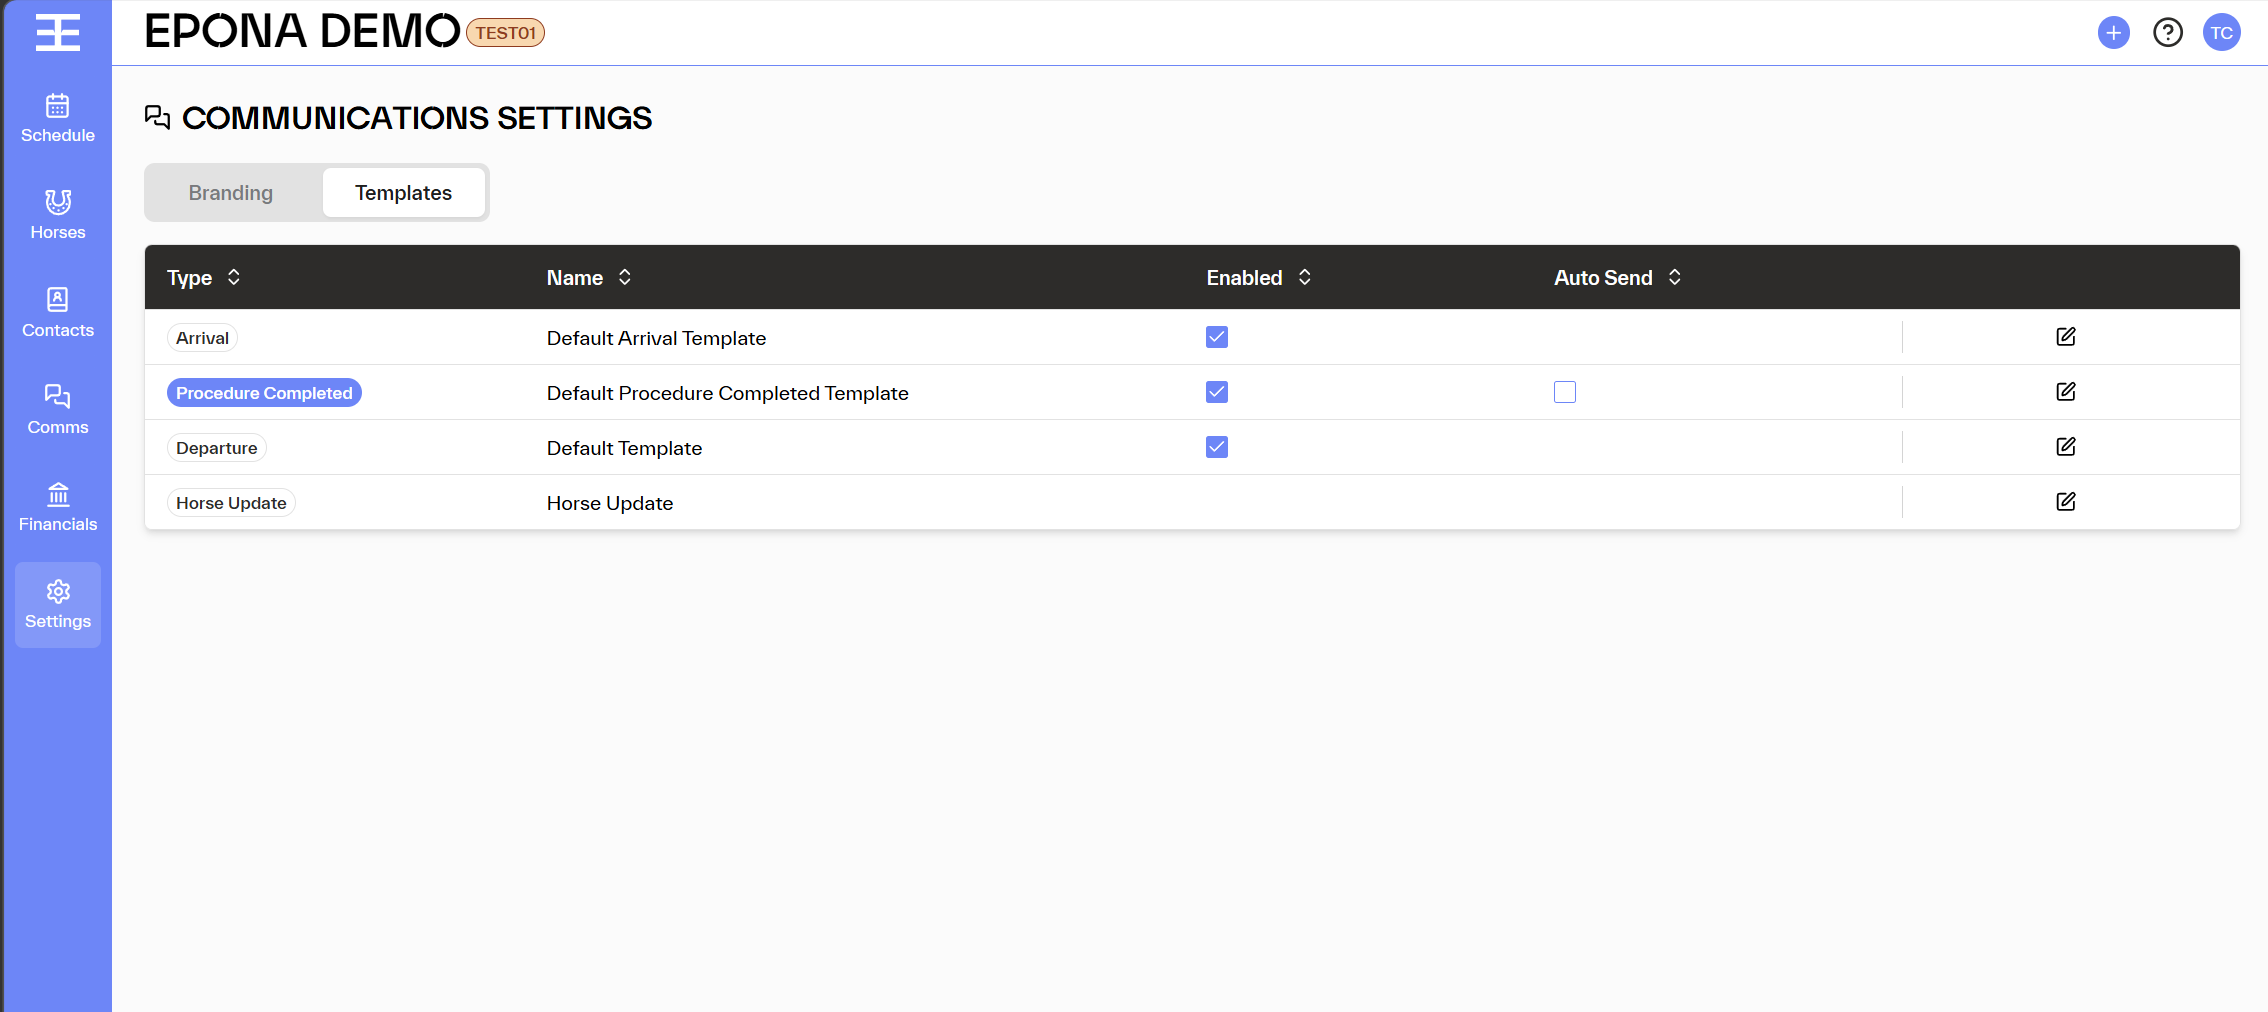
The Templates Screen
The Templates screen displays all communication templates configured for your workspace. Each row shows:
Column
| Description
|
|---|---|
| Type | The event trigger (e.g. Arrival, Departure, Procedure Completed) |
| Name | The internal name of the communications template |
| Enabled | Controls whether the Notify checkbox is pre-checked on the trigger screen |
| Auto Send | Controls whether communications are sent immediately or saved as a draft (Procedure Completed only) |
| Actions | Edit or delete the template |
Note: Only one template per event Type can be enabled at a time.
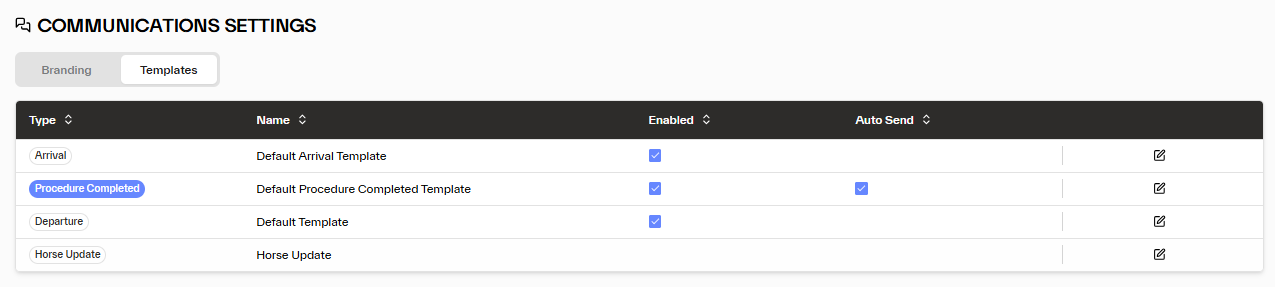
How the Notify Checkbox Works
When adding a procedure or processing a movement, a Notify checkbox appears on the screen alongside other options (Billable, Discount Rule).
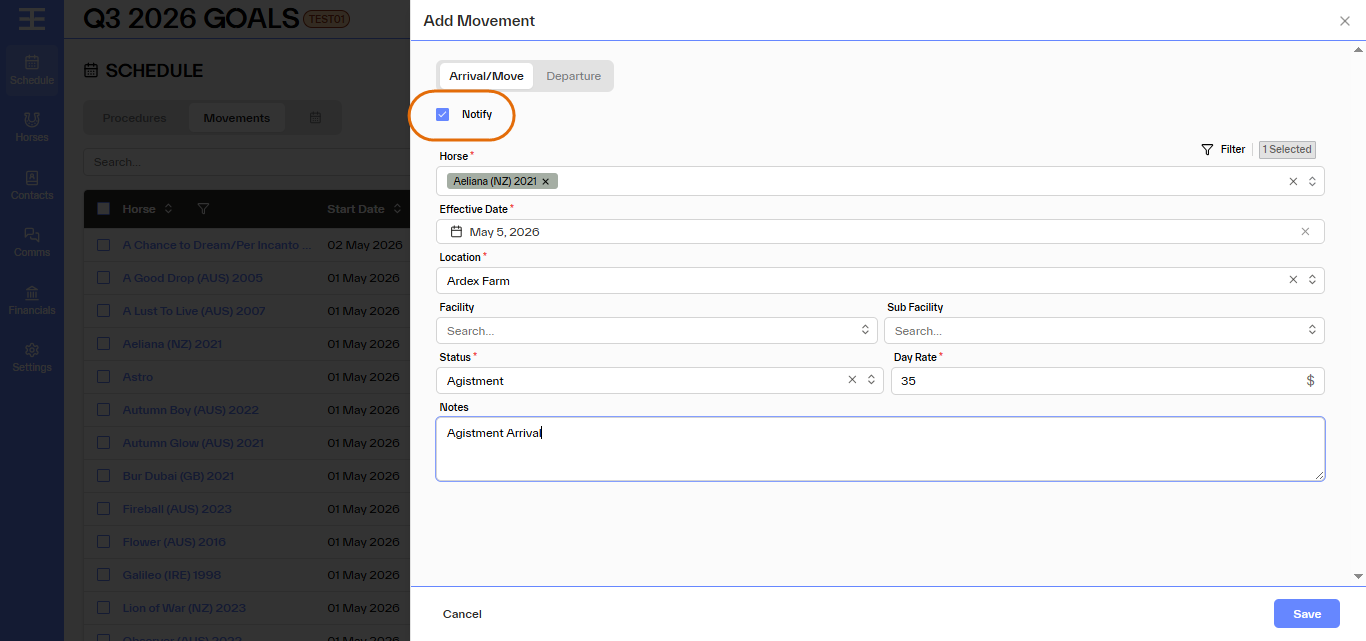
Default State
The default state of Notify is driven by the Enabled toggle on the matching template:
| Template Enabled | Notify Checkbox Default |
|---|---|
| ON | ✅ Pre-checked |
| OFF | ☐ Unchecked |
You can always override the default. Regardless of the template setting, you can manually check or uncheck Notify before saving.
What Happens When Notify Is Checked
When you save with Notify checked, the system generates a communication based on the matching template. What happens next depends on the Auto Send setting:
| Auto Send | Result |
|---|---|
| OFF (default) | A draft communication is created and saved under Comms → Drafts for review before sending |
| ON | The communication is sent immediately to all interested parties in the horse - no draft is created |
Note: Auto Send is only available on the Procedure Completed template. Arrival and Departure always create a draft.
Quick Reference
| Scenario | Notify Default | Auto Send | Outcom |
|---|---|---|---|
| Template enabled, Auto Send OFF | ✅ Pre-checked (can uncheck) | OFF | Draft created in Comms → Drafts |
| Template enabled, Auto Send ON | ✅ Pre-checked (can uncheck) | ON | Email sent immediately |
| Template disabled | ☐ Unchecked (can check) | — | If manually checked → draft created |
| Notify manually unchecked | ☐ Unchecked | — | No communication generated |
Edit Arrival Auto-Communication Template
This section explains how to update the Arrival communication template used when horses are marked as arrived.
Access the Template
Navigate to Settings → Communication Settings → Templates. Locate the Arrival template and click the Edit (pencil) icon at right.
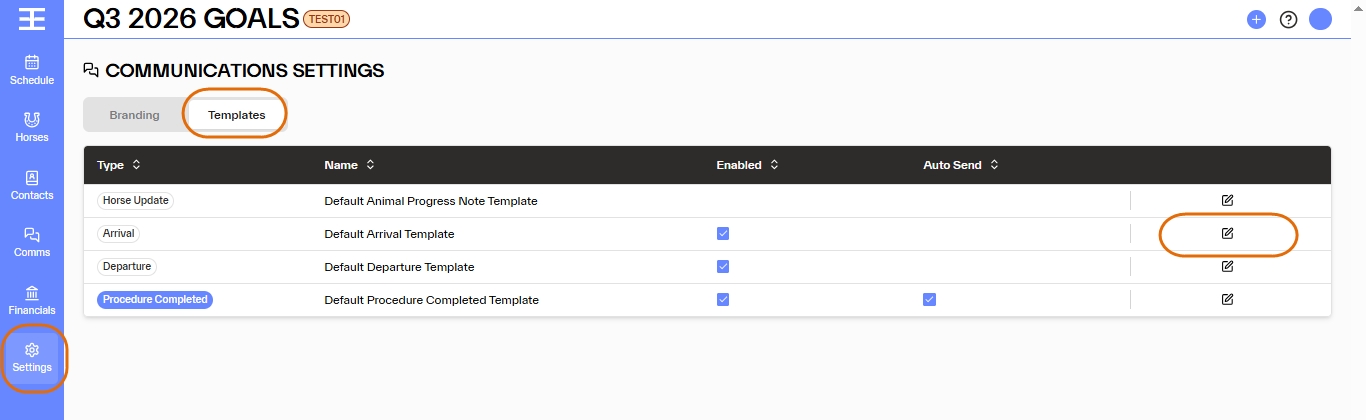
Update Template Details
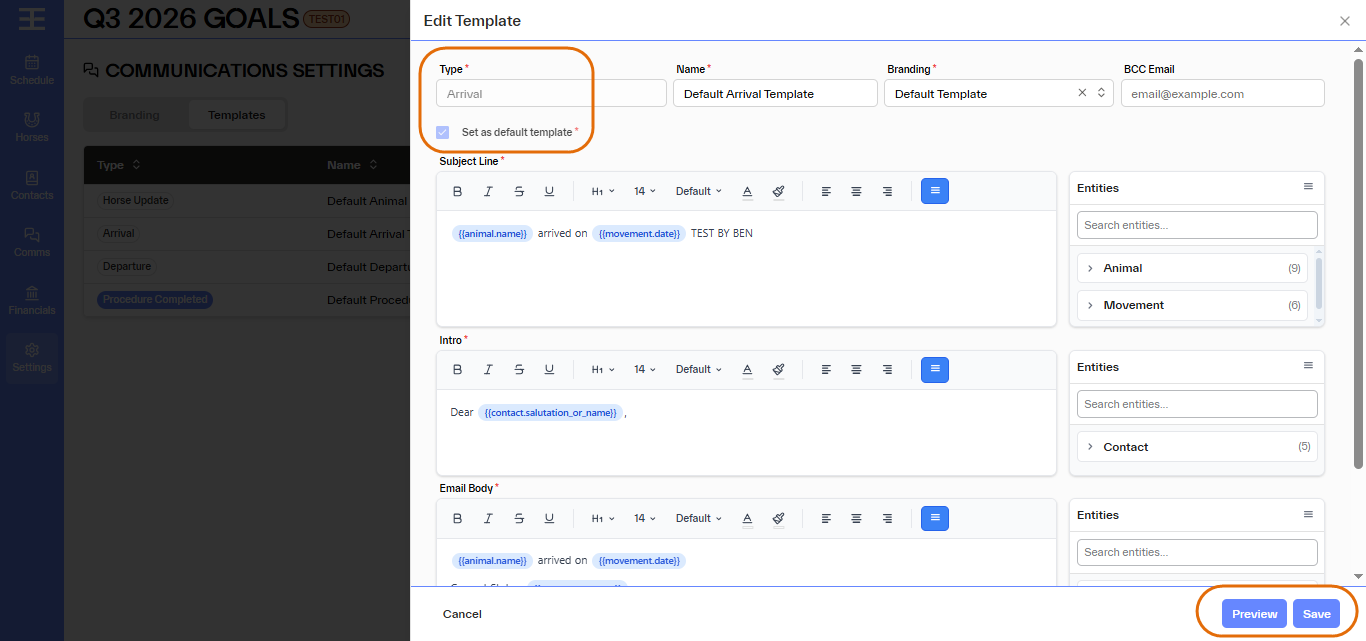
The Edit Template panel will open. From here you can:
- Update the Name – set the internal label (name) for this template
- Select the default branding – controls the email header/footer style and text style, per graphics and other settings saved to Communications Settings → Branding tab
- Add a BCC email address – optional, will copy every email sent to a Blind Copy email address
- Edit the communication content using free text and dynamic entities sourced from EPONA, including:
- Subject line
- Intro
- Email body (pre-populated with the default Arrival template)
Default Arrival email body:
Dear {{Salutation}} {{Contact.name}}, {{horse.name}} arrived on {{movement.effectiveDate}}. Current Status: {{movement.status}} We will keep you informed of the horse's progress.
Preview the Communication
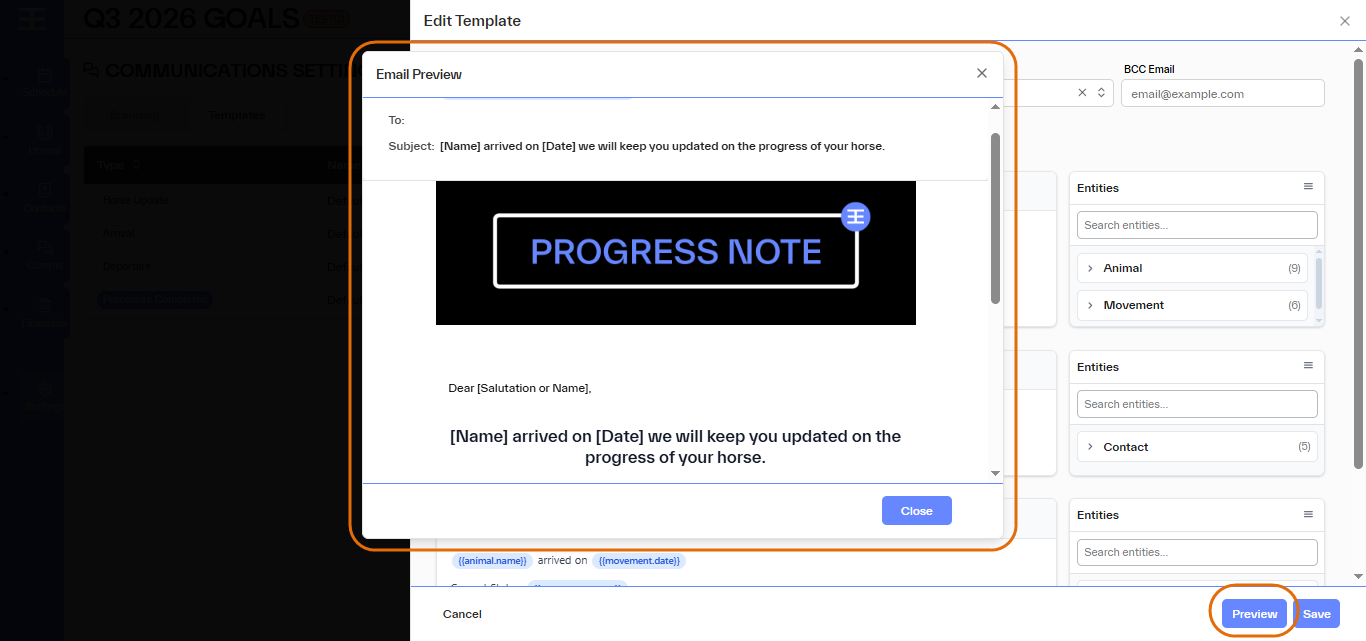
At any time, click the Preview button to generate a preview of the template before saving.
Enable or Disable Auto Communication
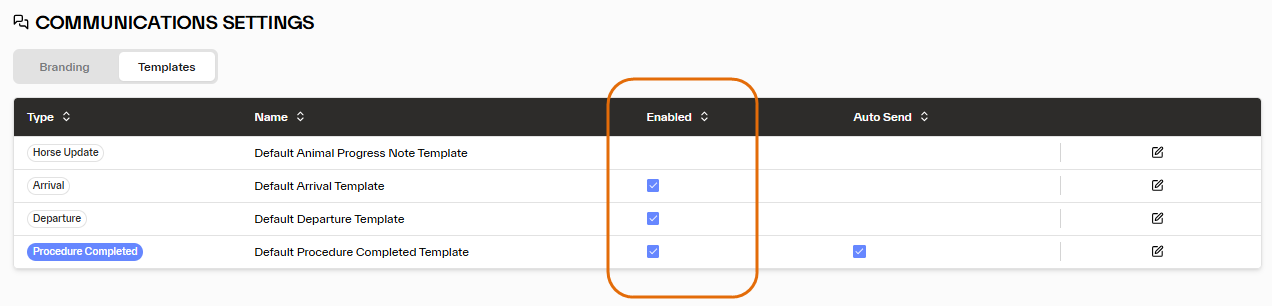
Once saved, use the Enabled checkbox on the Templates screen to control whether this template is active.
Enabled ON → The Notify checkbox on the Add Movement screen will be pre-checked. When saved, a communication is created as a draft in Comms → Drafts.
Enabled OFF → The Notify checkbox will be unchecked by default. No communication is generated unless the user manually checks Notify.
Edit Departure Auto-Communication Template
This section explains how to update the Departure communication template - used when horses are moved to a departed status.
Access the Template
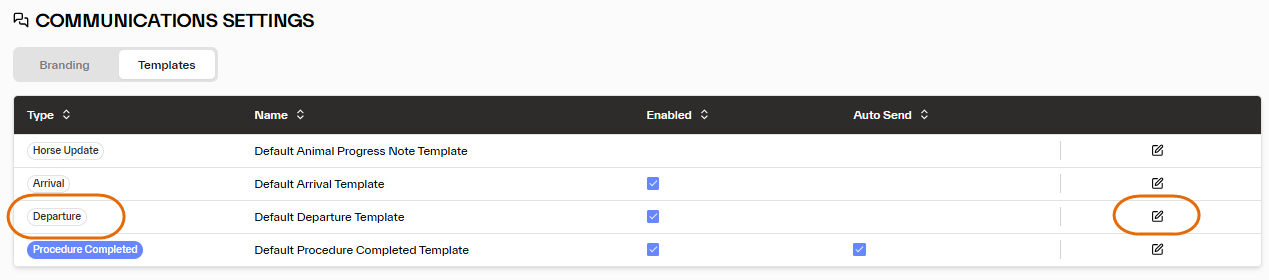
Navigate to Settings → Communication Settings. Locate the Departure communication and click the Edit (pencil) icon.
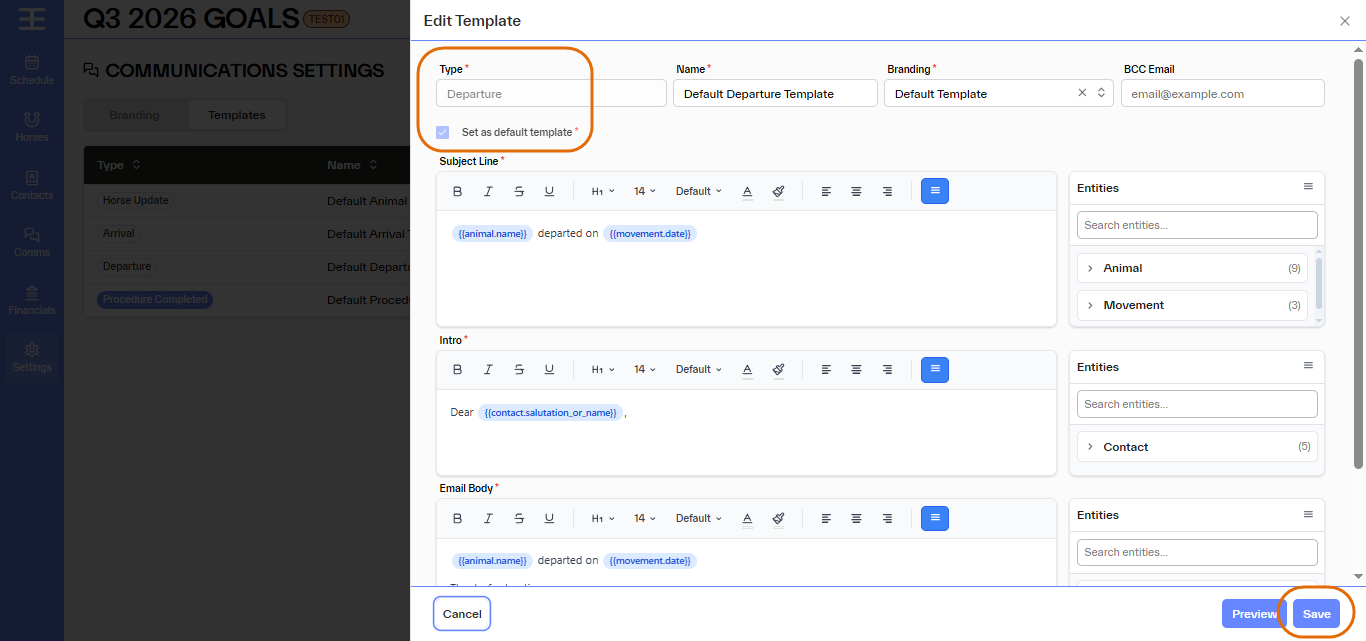
Update Template Details
The Edit Template panel will open. From here you can:
Update the Name
Select the default branding
Add a BCC email address
Edit the communication content, including:
Subject line
Intro
Email body (pre-populated with the default Departure template)
Default Departure email body:
Dear {{Salutation}} {{Contact.name}}, {{horse.name}} departed on {{movement.effectiveDate}}. Horse departed to: {{movement.location}}, {{movement.facility}}, {{movement.subfacility}} Thanks for trusting us.
Preview the Communication
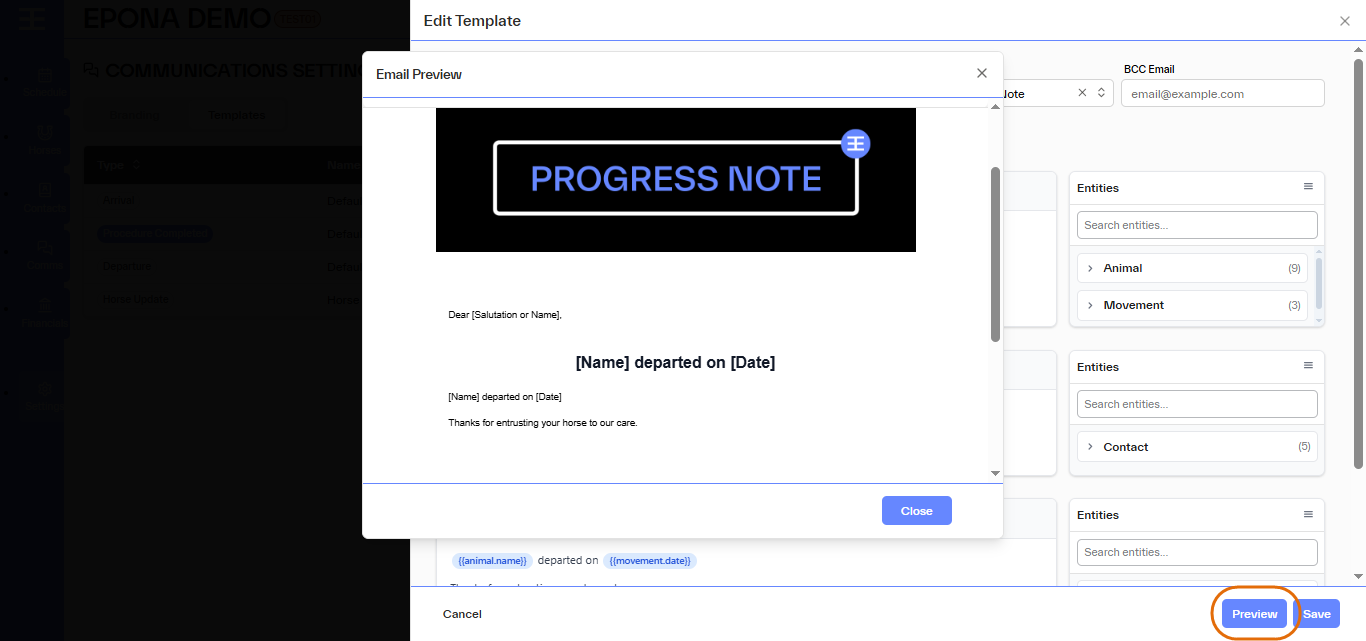
Click the Preview button at any time to review the template before saving.
Enable or Disable Auto Communication
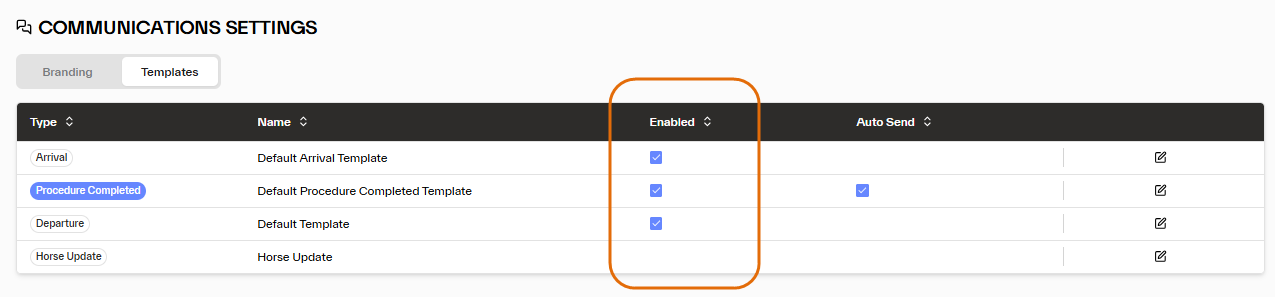
Enabled ON → The Notify checkbox on the Add Movement screen will be pre-checked. When saved, a draft communication is created in Comms → Drafts.
Enabled OFF → The Notify checkbox will be unchecked by default. No communication is generated unless the user manually checks Notify.
Edit Procedure Completed Auto-Communication Template
This section explains how to update the Procedure Completed communication template used when horses have a procedure completed against them.
Access the Template
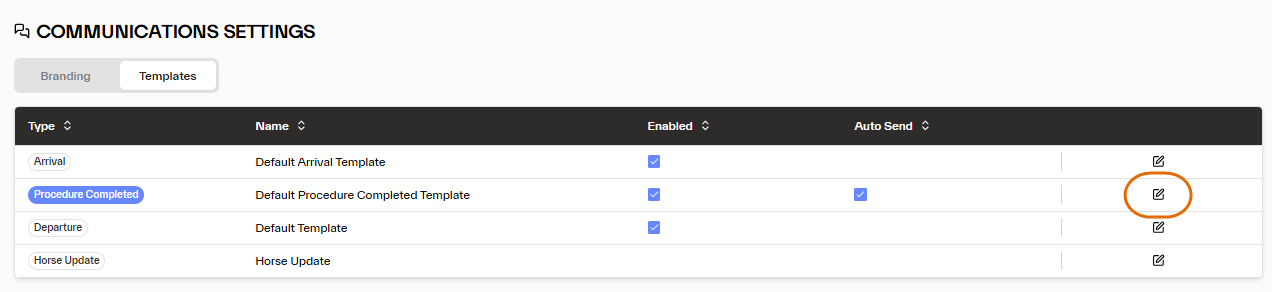
Navigate to Settings → Communication Settings. Locate the Procedure Completed communication and click the Edit (pencil) icon.
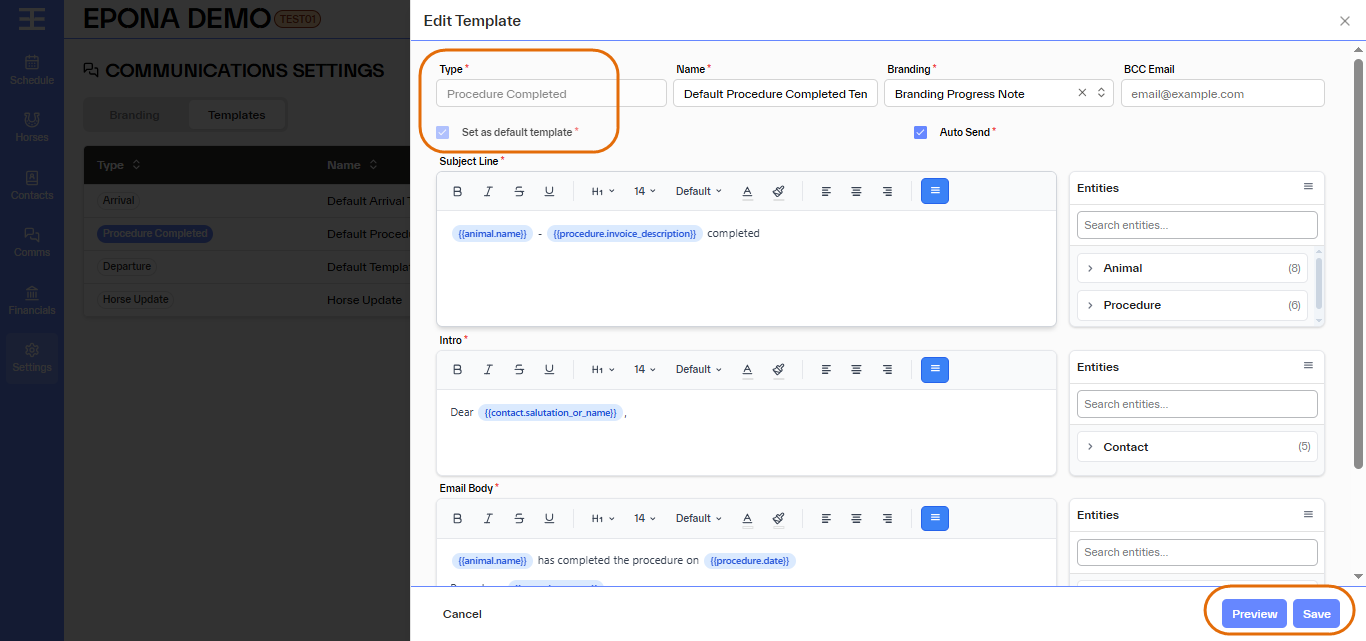
Update Template Details
The Edit Template panel will open. From here you can:
Update the Name
Select the default branding
Add a BCC email address
Edit the communication content, including:
Subject line
Intro
Email body (pre-populated with the default Procedure Completed template)
Default Procedure Completed email body:
Dear {{Salutation}} {{Contact.name}}, {{horse.name}} has completed the following procedure: Procedure: {{Procedure.name}} Date: {{Procedure.completedDate}} Performed by: {{Procedure.performedBy}} Please let us know if you have any questions.
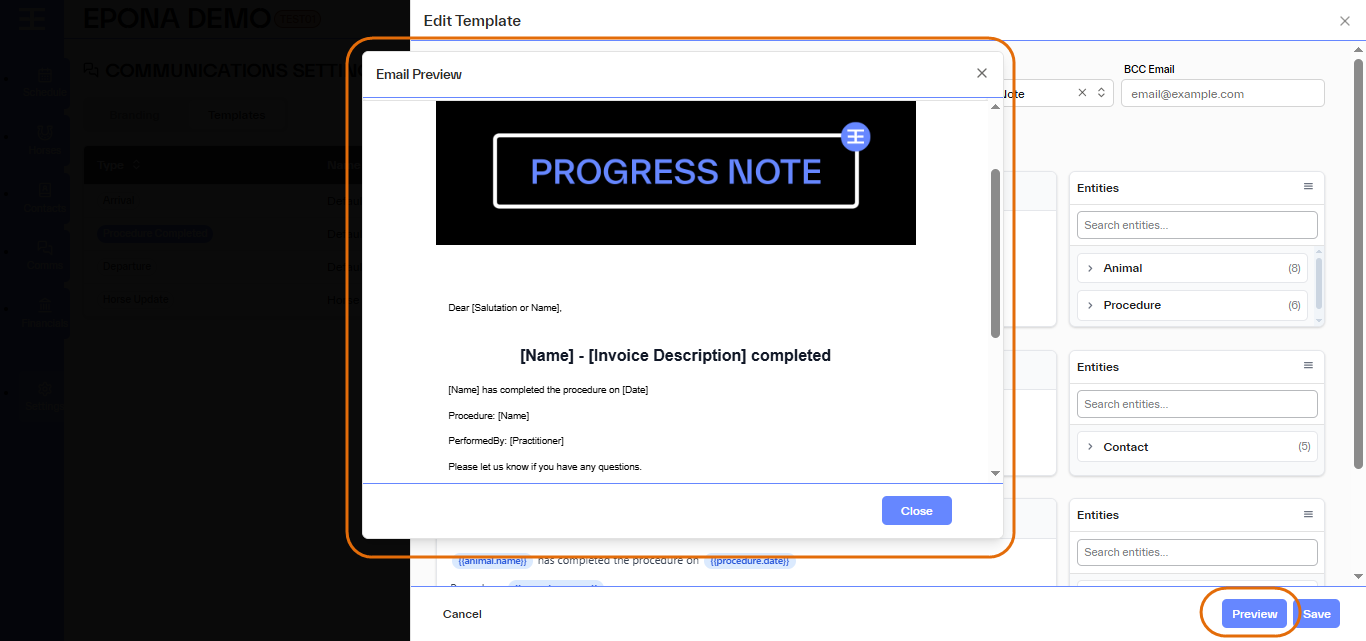
Preview the Communication
Click the Preview button at any time to review the template before saving.
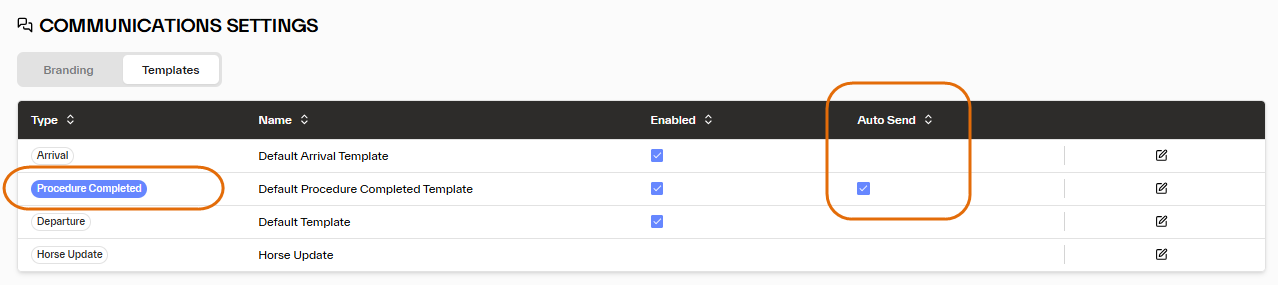
Enable or Disable Auto Communication and Auto Send
Enabled checkbox:
ON → The Notify checkbox on the Add Procedure screen will be pre-checked. A communication is created when the procedure is saved.
OFF → The Notify checkbox will be unchecked by default. No communication is generated unless the user manually checks Notify.
Auto Send checkbox (Procedure Completed only):
ON → The communication is sent immediately to all interested parties when the procedure is saved with Notify checked — no draft is created.
OFF → A draft communication is created in Comms → Drafts for review before sending.
Related Articles
Communications Branding Templates